The Settings section allows you to set monitoring and reporting settings.
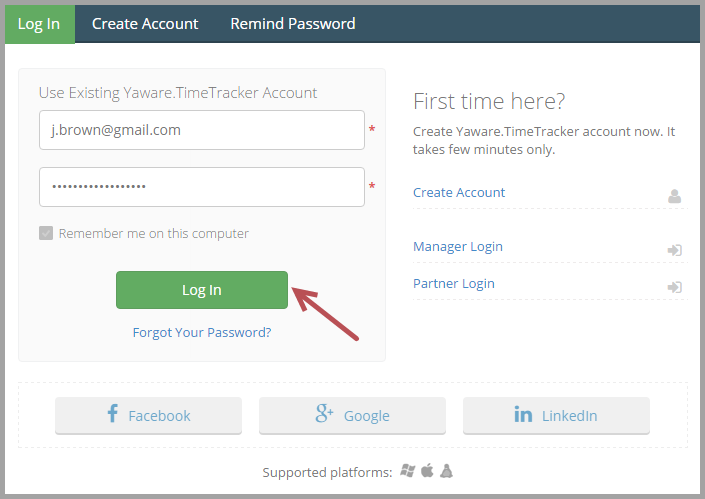
1. Login to your Yaware.TimeTracker online account.
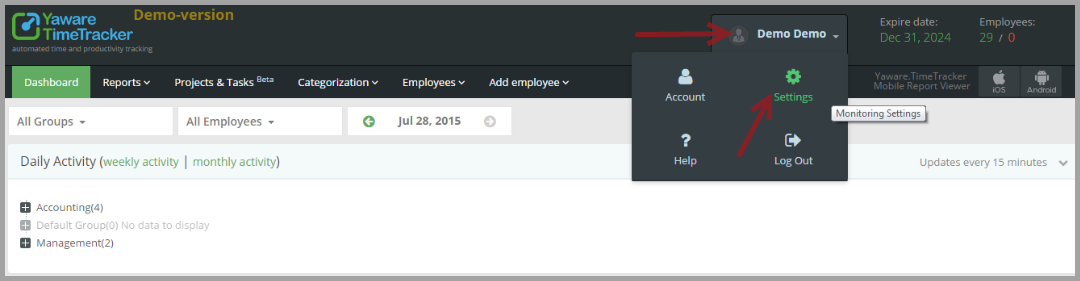
2. Click on your profile name in the right top corner and press Settings.
3. To run the application in a visible mode, click on Display Yaware.TimeTracker tray icon. Thus, employees will be aware that they`re being monitored and will be able to look through the reports about their performance.
If this option is unchecked, Yaware.TimeTracker will run in “hidden” mode, which means that employees will be unaware of monitoring.
![]()
4. Click on Allow pauses in monitoring if you want to authorize your employees to pause monitoring. If this option is checked, users will be allowed to stop monitoring for 10 min, 20 min, 30 min, 1h, 2h or until the end of the day by themselves. The monitoring will automatically resume after a specified time period. To pause monitoring a user should right mouse click on Yaware.TimeTracker icon and select suspend monitoring.

5. Click on Allow stop monitoring if you want your employees to stop monitoring.

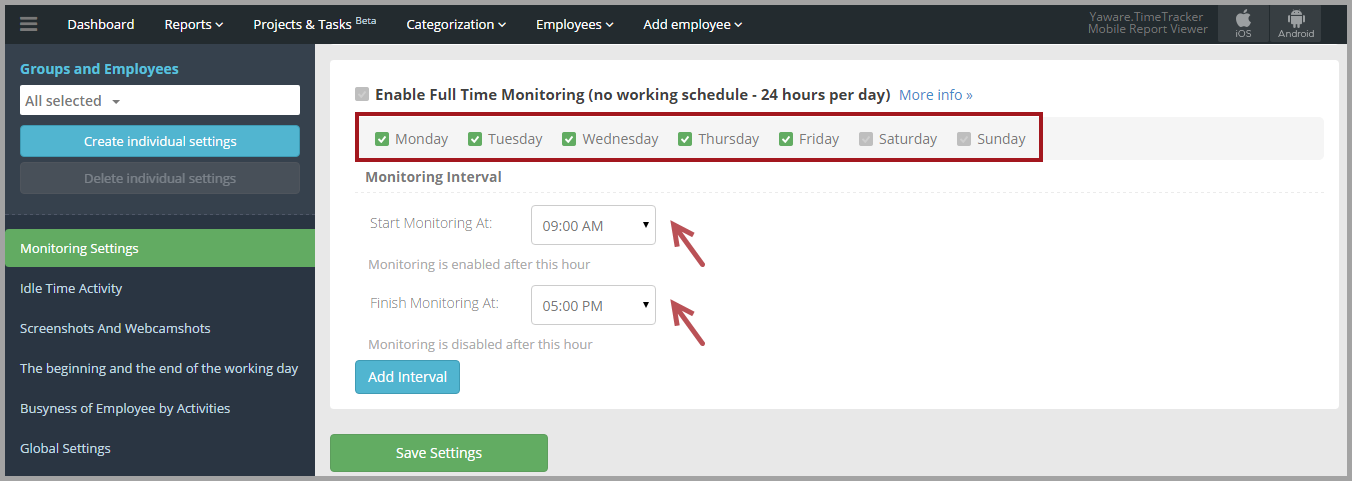
6. Choose full time monitoring schedule by clicking on Enable Full Time Monitoring (no working schedule – 24 hours per day):

Or, you can untick this option and customize the settings to your employees schedules. Tick the appropriate days and set the time for starting and finishing monitoring:
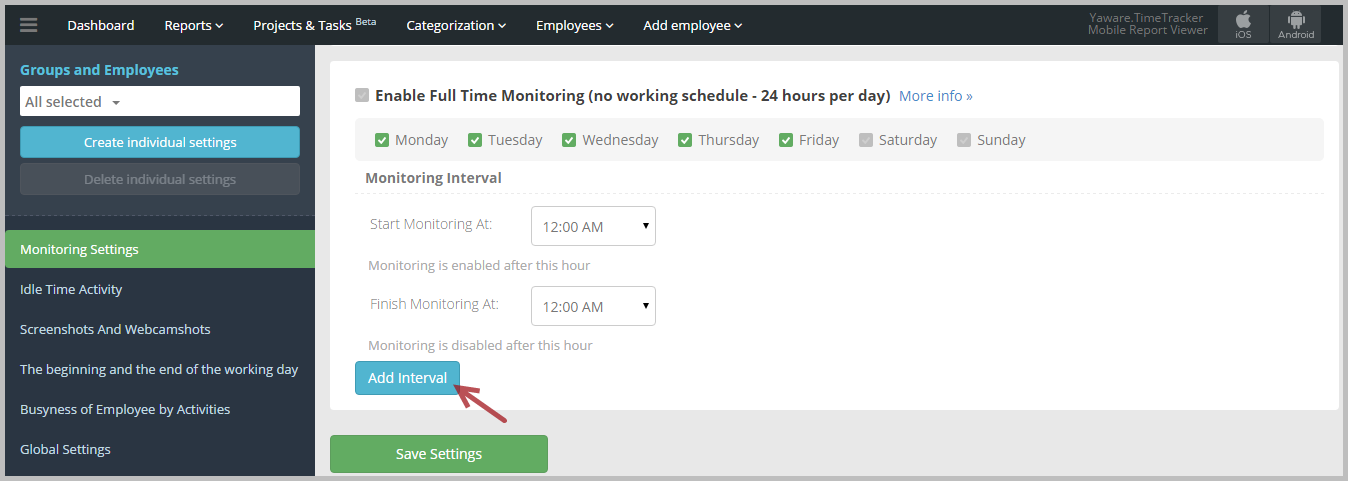
7. Click on Add interval to (this is especially useful when employees are on individual schedules, e.g. three hours in the morning and 4 hours in the evening.)
Click on Save Settings to save changes.
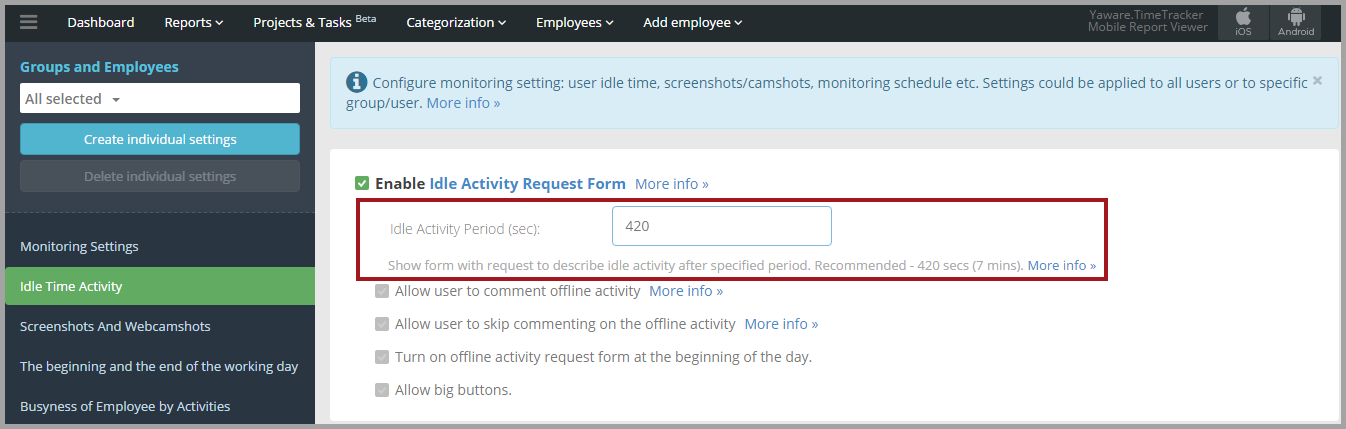
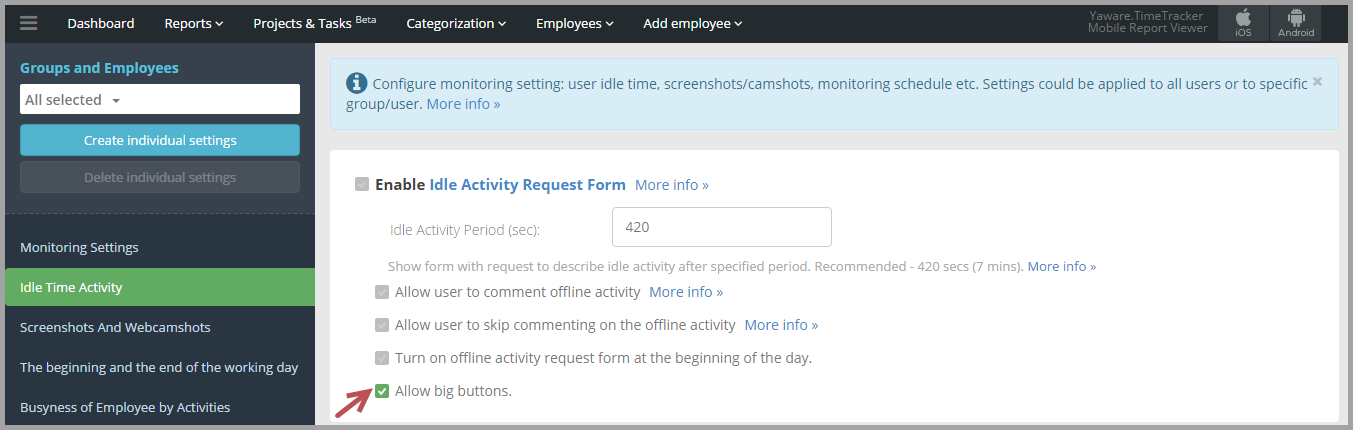
8. Go to Idle Time Activity on the left bar and click on Enable Idle Activity Request Form, if you want to track offline activities (e.g., meetings, breaks, etc.). Tick appropriate boxes to customize offline monitoring:

9. Specify Idle Activity Period (recommended period is 420 secs (7 mins) in the appropriate field:
10. Click on Allow user to comment offline activity if you want more details on his/her offline activities.
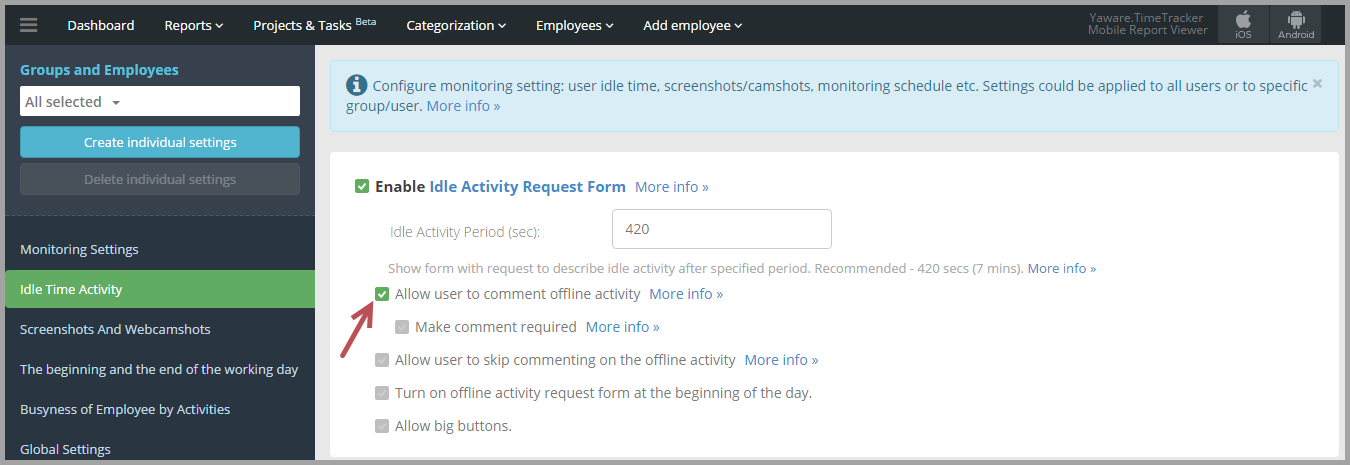
You can also make comment mandatory by ticking Make comment required option.

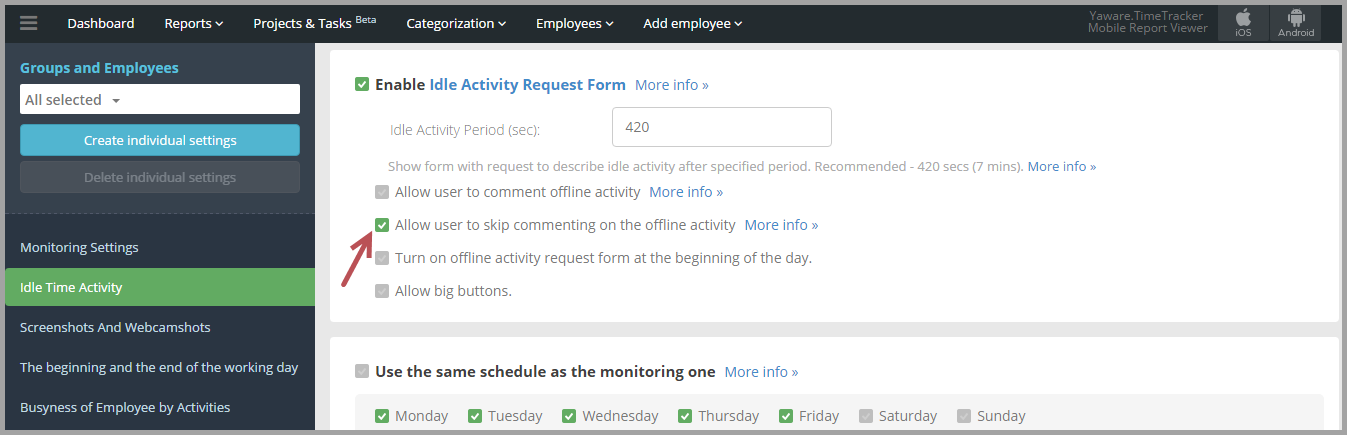
11. Click on Allow user to skip commenting on the offline activity if you don’t need more details on offline activities.
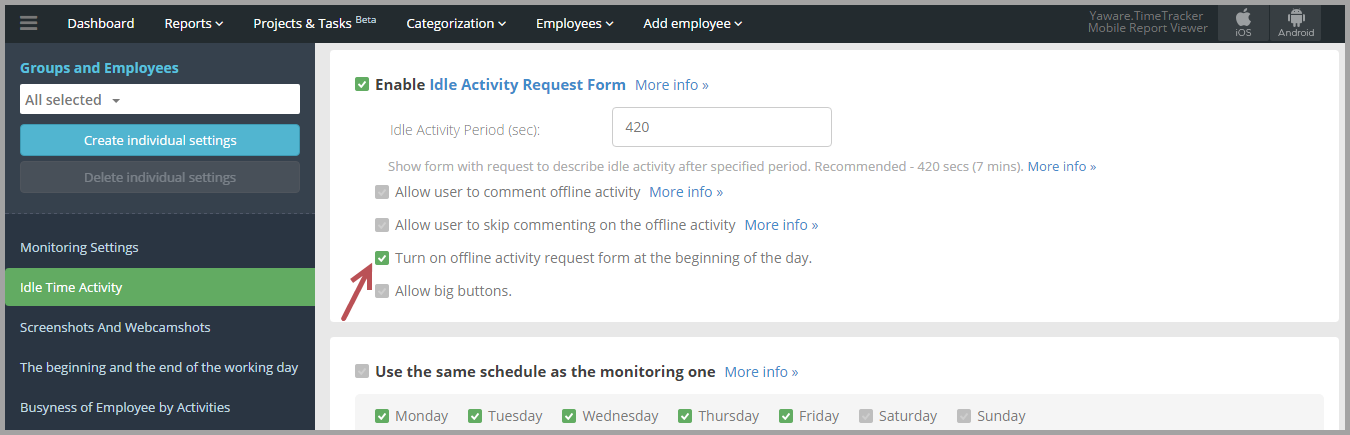
12. Click on Turn on offline activity request form at the beginning of the day if you need to know why an employee was late for work.
13. Click on Allow big buttons to create new standard descriptions for offline activities, and even if they are long, the whole text will be fully displayed in a bigger than others pop-up window.
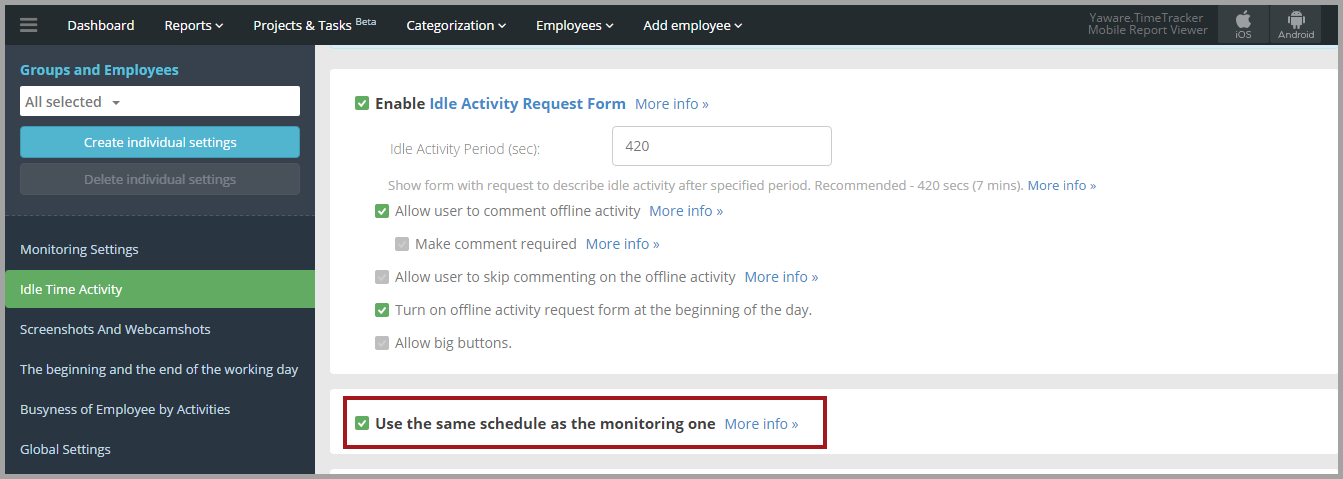
14. Next, choose monitoring schedule for offline tracking. Click on Use the same schedule as the monitoring one if you want it to be the same:
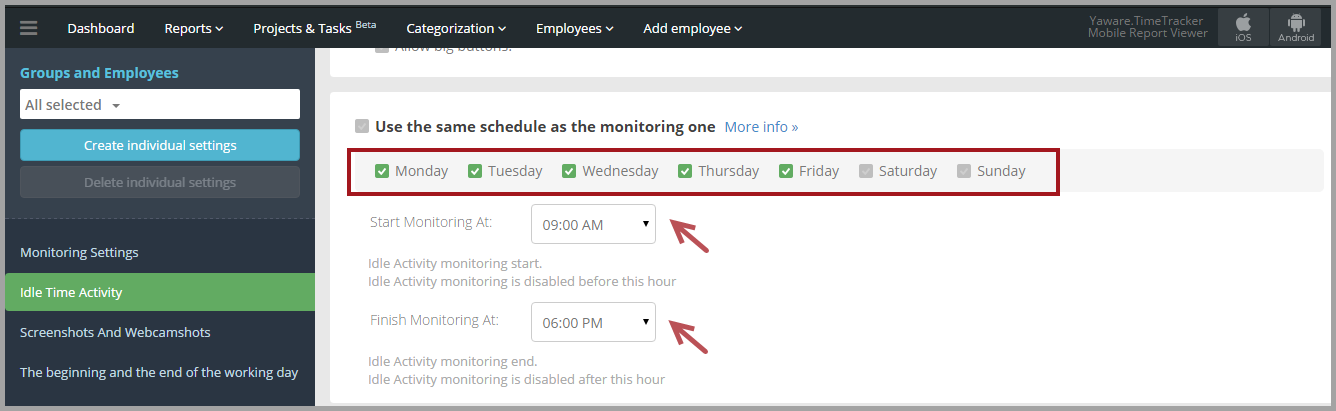
Or, untick this option and customize monitoring schedules to your needs (e.g., from 9 am till 6 pm):
15. Next, specify the list of idle activities. Click on Idle list, then on Add New Activity:
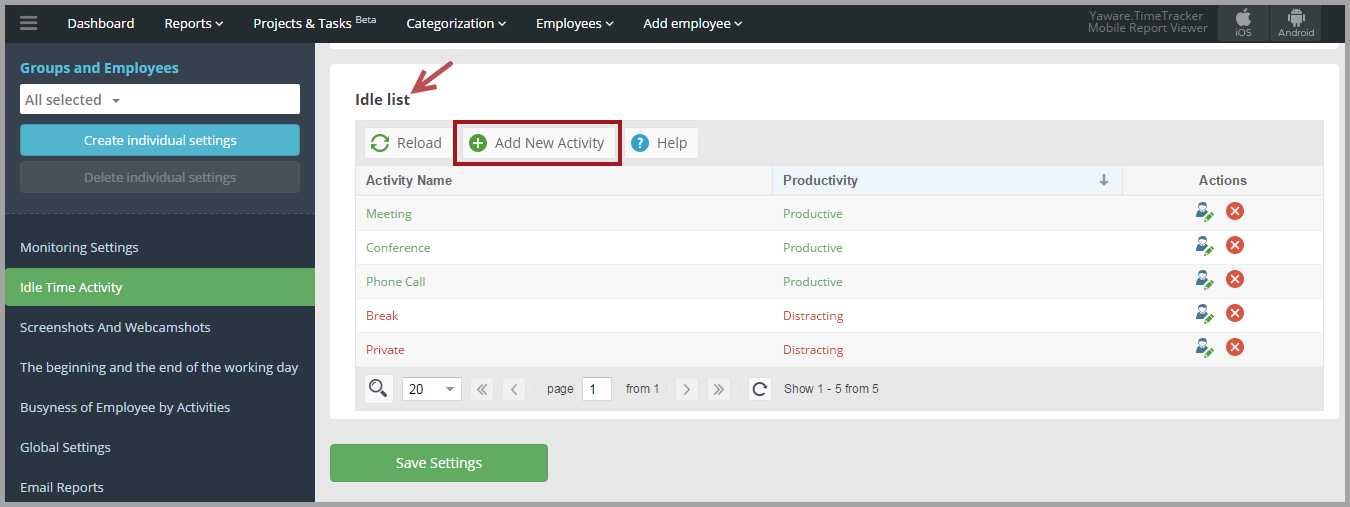
16. In the newly opened window specify the name of an activity and its productivity status. If you want users to leave comments on the activities click on Is comment required. If you don’t need this option, just skip it:
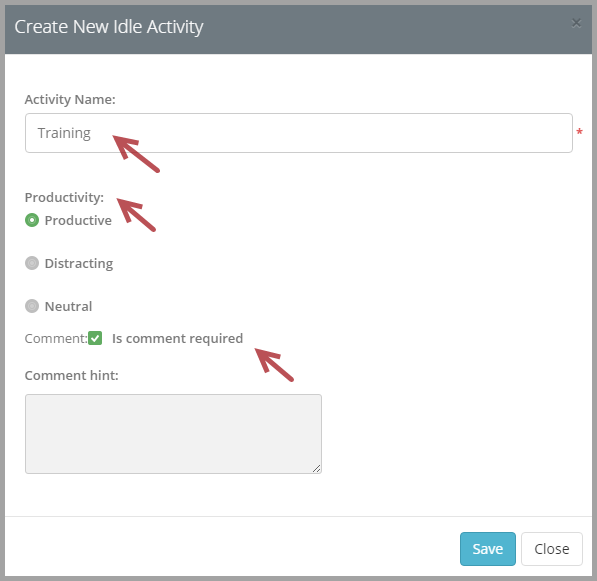
Click on Save to save changes.
17. Next, click on Screenshots and Webcamshots tab on the left bar. Tick Capture Screenshots and Capture Webcam Snapshots to enable them. Also specify capture period for both (the minimal value is 3 mins):

Click on Save settings to save changes.
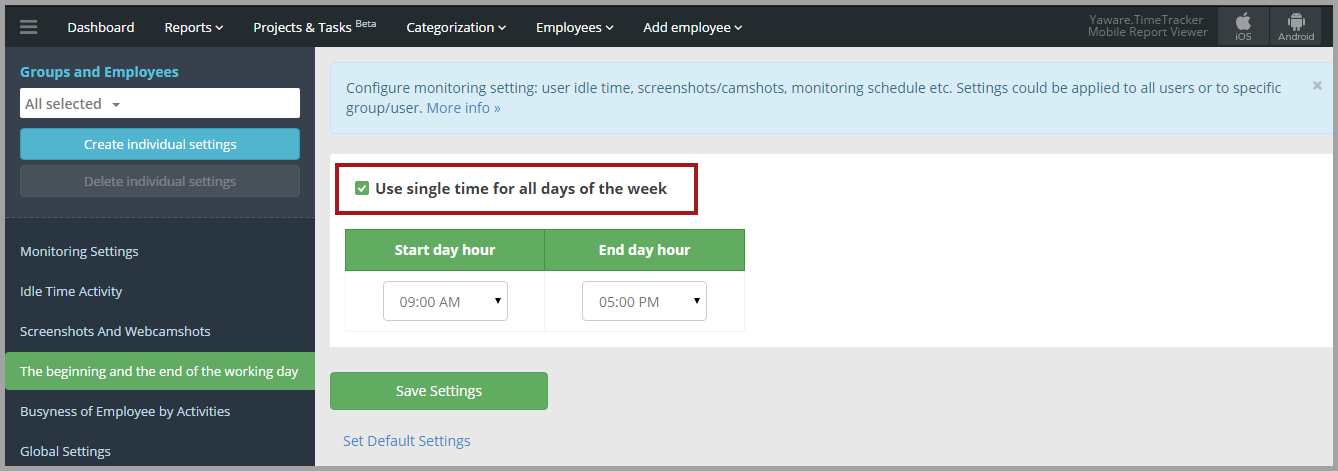
18. Click on The beginning and end of the working day tab on the left bar. You can use single time for all days:
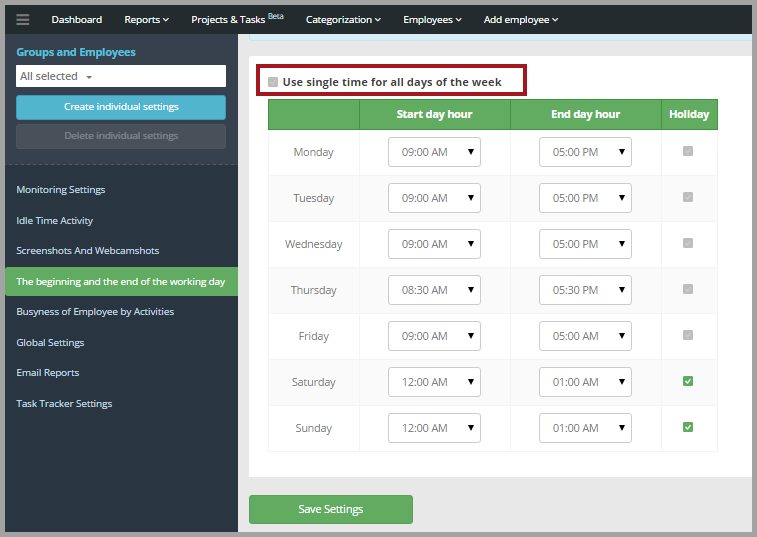
Or, you can untick this option and customize the time:
Click on Save Settings to save changes.
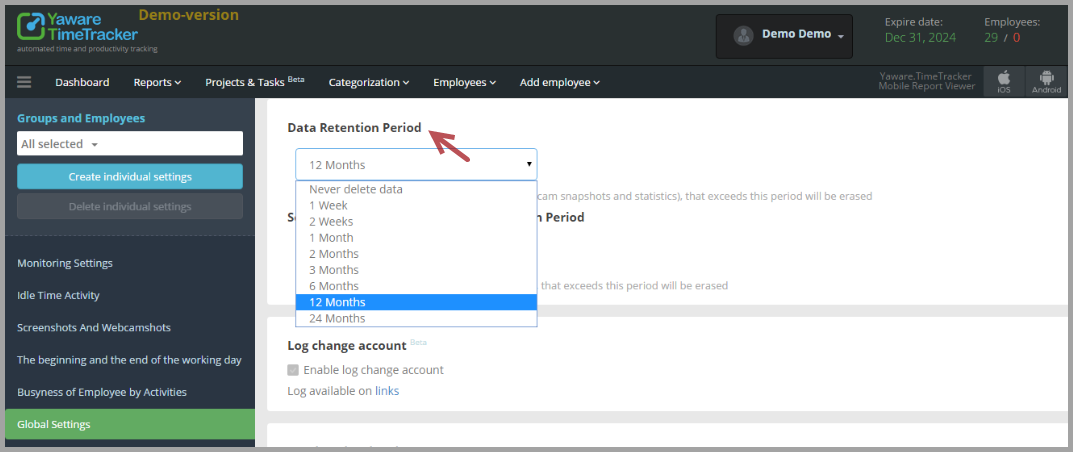
19. Go to Global Settings tab on the left bar. Click on Data Retention Period and choose the one you need (e.g., 12 months).
20. Click on Screenshots/Webcam snapshots Retention Period to set the one you need (e.g., 12 months):

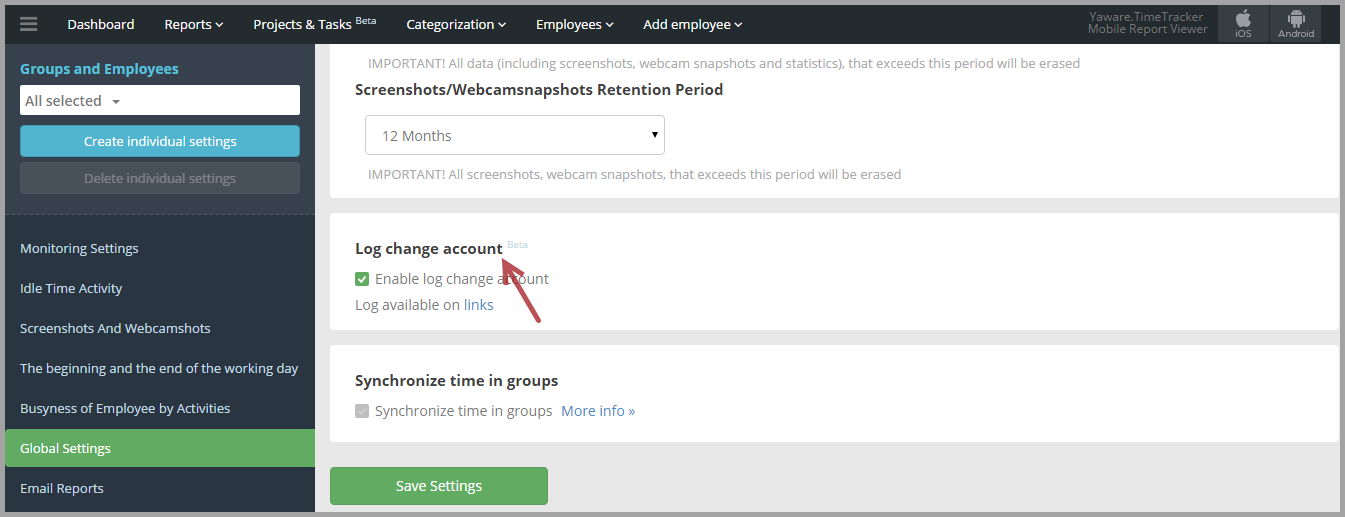
21. Click on Log change account to view all changes that occurred in your account (this option is useful for technicians and large companies with centralized repository logs.)
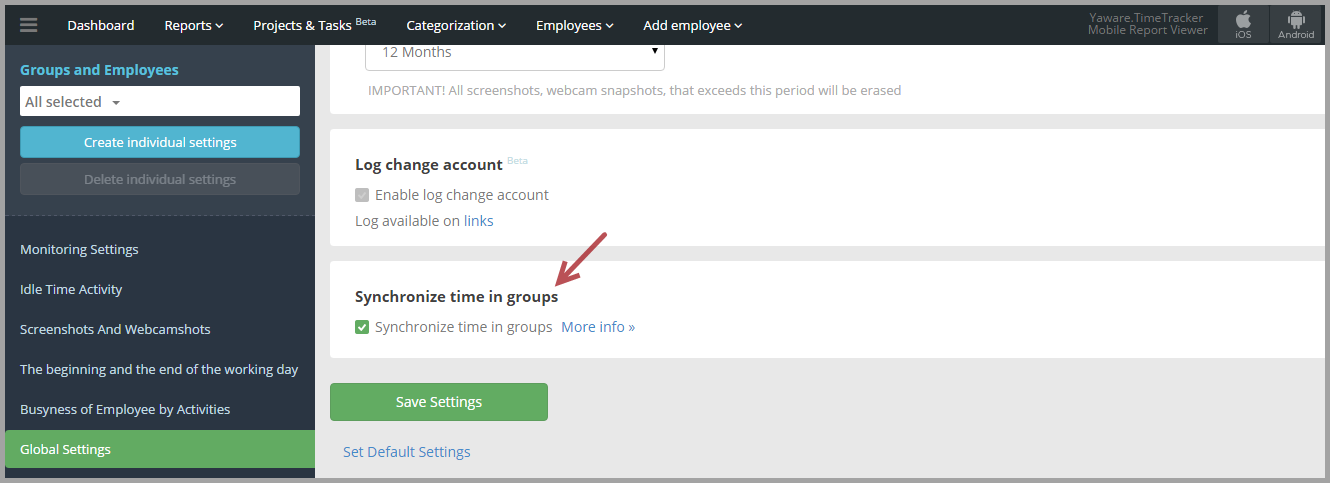
22. Click on Synchronize time in groups if you want to synchronize the beginning of the working day of departments on different schedules.
Click on Save Settings to save changes.
23. Click on Email Reports tab on the left bar. Next, choose the frequency of reports you need by ticking the appropriate option – daily, weekly, or monthly.

23. Choose specific days for daily reports by selecting appropriate days:

Click on Save to save changes.
You’re done – you’ve successfully specified the monitoring settings.